Difference between revisions of "Import CSV"
From EHS Help
| Line 3: | Line 3: | ||
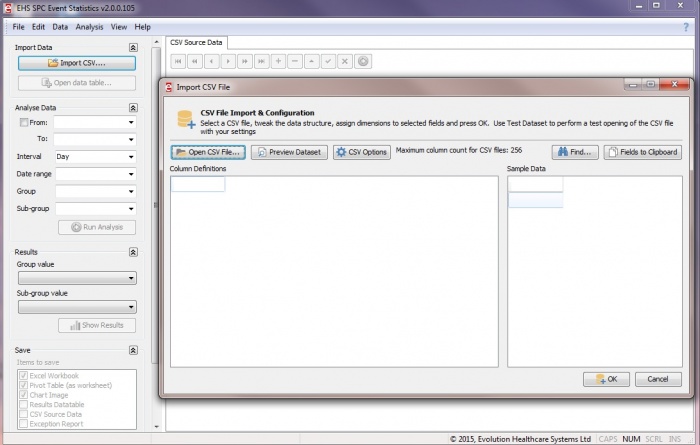
Once Event Stats is opened the import CSV button is active on the Navigation bar to the left of the screen. | Once Event Stats is opened the import CSV button is active on the Navigation bar to the left of the screen. | ||
| − | Click | + | Click '''Import CSV'''. |
An Import CSV wizard will appear. | An Import CSV wizard will appear. | ||
| Line 20: | Line 20: | ||
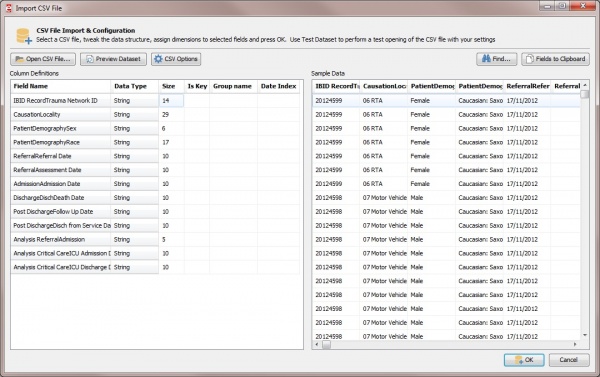
[[File:ImportCSVFile.jpg|center|600px]] | [[File:ImportCSVFile.jpg|center|600px]] | ||
| − | In the right side section the Field's edited, click on the field name. | + | In the right side section the Field's can be edited and grouped, click on the field name. |
| + | |||
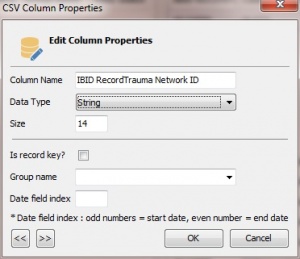
| + | A CSV column properties box will appear. | ||
[[File:EditColumnProperties.jpg|center|300px]] | [[File:EditColumnProperties.jpg|center|300px]] | ||
| + | |||
| + | The current column name is displayed, highlight the column name and type in new name or reference. | ||
| + | |||
| + | Data Type - this will be | ||
Revision as of 15:41, 5 February 2015
Importing CSV File
Once Event Stats is opened the import CSV button is active on the Navigation bar to the left of the screen.
Click Import CSV.
An Import CSV wizard will appear.
Select the required CSV file from the documents folder.
Please note CSV files must have no more than 256 columns.
The Column Definitions list will appear in the right side section of the Import wizard.
The first 20 columns will be displayed as a sample in the Sample data section to the left of the Import Wizard.
In the right side section the Field's can be edited and grouped, click on the field name.
A CSV column properties box will appear.
The current column name is displayed, highlight the column name and type in new name or reference.
Data Type - this will be


