Getting Started with AreaCalc for Burns
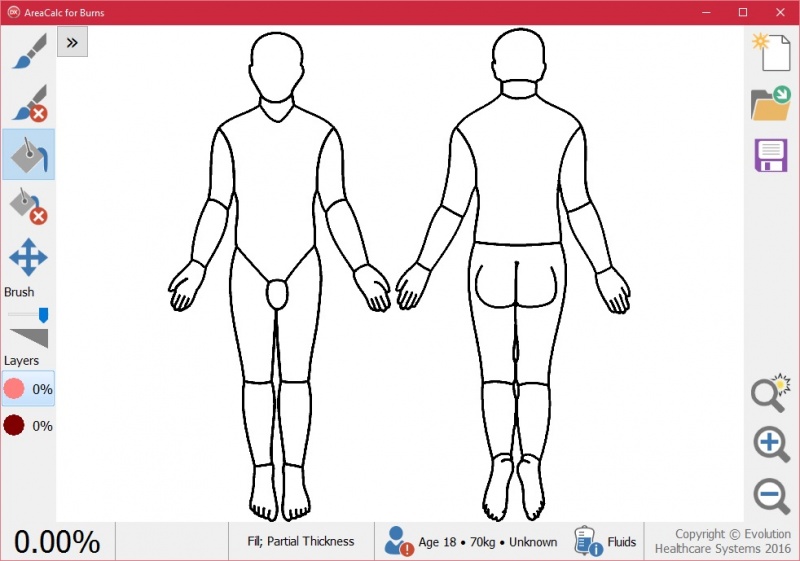
Area Calc opens with a Lund and Browder image displayed.
![]() Choose "Paint Brush" or
Choose "Paint Brush" or ![]() "Fill" located on the left of the app to enter detail in to the image.
"Fill" located on the left of the app to enter detail in to the image.
![]() Choose Delete Brush or
Choose Delete Brush or ![]() Delete Fill to Delete detail.
Delete Fill to Delete detail.
![]() Use the zoom in, Zoom out and back to normal buttons to add finer details.
Use the zoom in, Zoom out and back to normal buttons to add finer details.
Once zoomed in on the image the click the right right mouse button to pan image, alternatively and for tablet use, the ![]() will pan the image with left mouse button or finger.
will pan the image with left mouse button or finger.
 To alter the thickness of the brush slide tab left or right.
 The paint layers are displayed in two colours, Pink for partial thickness burn, Red for full thickness.
![]() the burn percentage will be displayed at the bottom left of the page as painting takes place.
the burn percentage will be displayed at the bottom left of the page as painting takes place.
![]() The burn severity selected will be displayed on the status bar.
The burn severity selected will be displayed on the status bar.
Patient Profile
![]() Located on the status bar click the Patient icon to display the Patient profile.
Located on the status bar click the Patient icon to display the Patient profile.
Patient profile records the time of injury and time of assessment, the patients age, weight and gender.
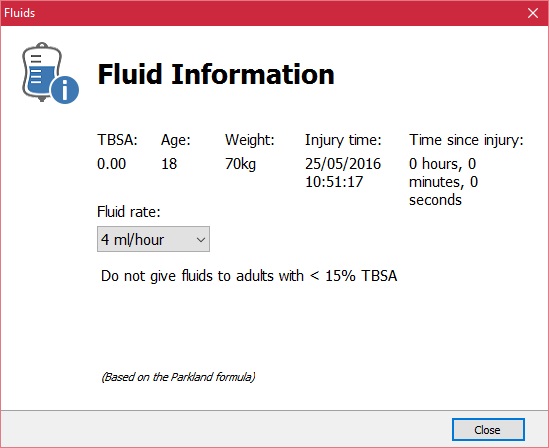
From these details the patients fluid requirements will be calculated.
Enter any other relevant information in the the "Other Information" box.
Fluid Requirement
The patients


