Query Results
This topic is for AquilaCRS
Contents
Introduction
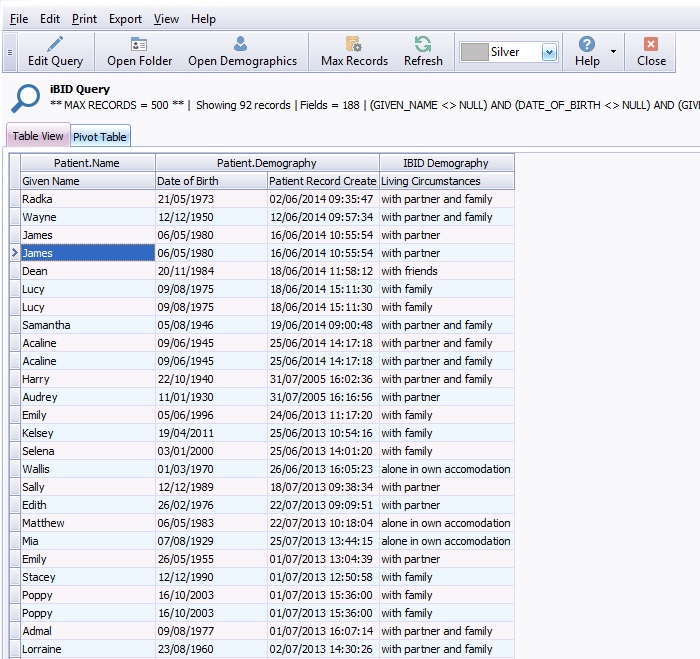
Once the query has been run and the results returned, details of the search fields are displayed below the toolbar.
Please note; The Query brings back results for each Ibid Record or Dependency record the patient has had, in cases where the patient has has several ibid or dependency records each entry will occupy a separate row. Not to be mistaken as duplicate records.
On the toolbar there are several options as follows-
Edit the Query - This will return the user to the original Query whilst still displaying the query results, filter and fields can be added as needed, the query can then be re run.
Open Folder - Highlight the patient name and click the "Open Folder" button, the selected patient folder will be displayed.
Open Demographics - Highlight the patient name and click the "Open Demographics" button, the selected patient demographics will be displayed.
Max Records - Results will be returned for the first 250 records, clicking the "Max Records" box will return all record with the selected fields
Refresh - Refreshes data in the search
Colors, Drop Down Box - where numerous searches are open, each search can be allocated a colour for ease of identification, Choose from a host of colours SearchColours.jpg
Help - The help button will take you to Aquila Help.
Close - The close button will close the query.
The query results are divided into two sections: the data table and the pivot table.
Results Data Table
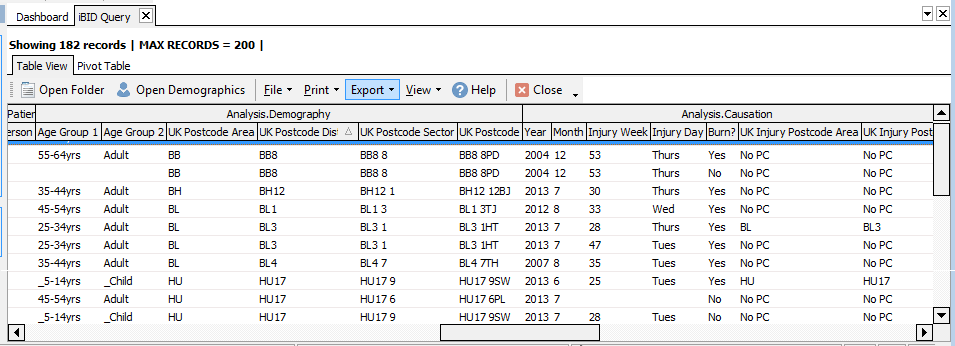
Query results are presented in a data table which allows local filtering, sorting and grouping.
If a patient has multiple Ibid Or Dependency records each record will be displayed in a row of it's own. Please note it may look like there are duplicate records as the Patients name is displayed next to each entry but this is not the case.
See the Data Tables topic for more details on sorting, filtering and grouping.
Record Limits
Please note: transferring large amounts of data across the network can result in slow response times or time-outs. Try to restrict your results by carefully entering your Query Filter and selecting only the necessary fields in the Output Field list.
Exporting data
From version 1.2 users will need the Export permission in order to take data out of the database
Excel
Menu: Export > Export to Excel...
Since version 1.1.8 it is no longer necessary to have Excel installed on your machine in order to export to Excel.
Selecting this menu option will prompt you for a folder and file name, and also a file type that is equivalent to the different versions of Excel files.
Navigate to your required folder and enter a meaningful filename & press OK.
Once the export has completed Windows Explorer will be opened with your file highlighted. If you have Excel installed you can double click to open the worksheet directly.
CSV (Comma Separated Values)
Menu: Export > Export to CSV...
The CSV format is a commonly used data inter-change format. Exporting to CSV can be used when you need to import the data into a database or spreadsheet product other than Excel.
The data is exported in a format similar to this snippet (with headers):
 "UK Postcode District","Year","Month","Injury Week"
 "SK3","1987","5","16"
 "SK9","2002","5","16"
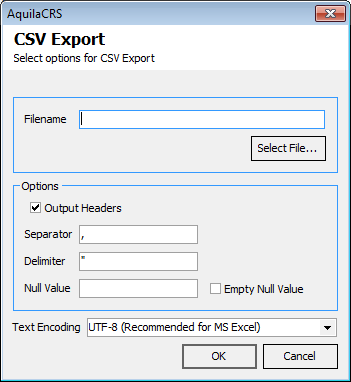
When choosing to export to this format you are prompted to set specific values for the delimiter, separator and other values:
Select the folder & file name. Generally you will leave the remaining options as is, unless you have a specific requirement. Press OK to export.
Once the export has completed Windows Explorer will be opened with your file highlighted. You can now work with your file independently.
Menu: Print > Report to PDF
Use this option to create the PDF file from the currently displayed data table.
Menu: Print > Report Page Setup
Use this option to adjust page sizes, orientation, etc.
Menu: Print > Report Preview
Displays a preview of the PDF output on screen. Use this option to check the output is correct before saving to PDF.
Results Pivot Table & Chart
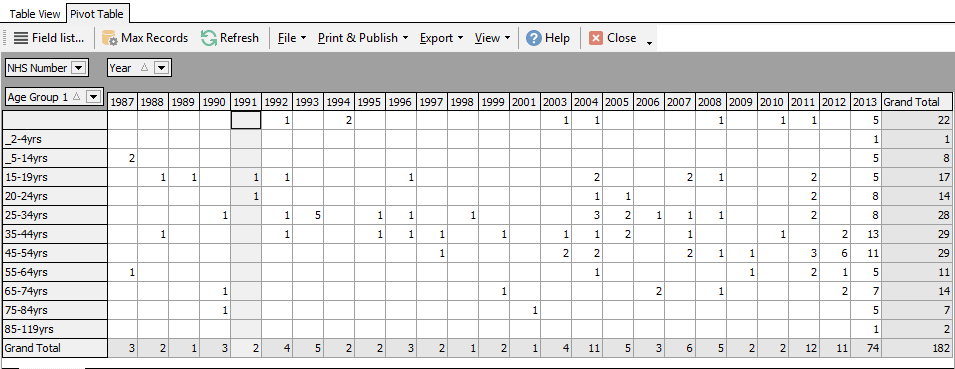
A pivot table can help summarise and provide insights into otherwise flat data. One has to start producing a pivot table by first deciding what information one wants out of the pivot table, such as how many cases did we admit last year on a monthly basis?.
Pivot tables are available natively in many applications, notable MS Excel. Functionality in iBID is provided to allow ad-hoc table production without the need to export potentially sensitive data outside of the iBID database.
Detailed instructions on building a pivot table
The Pivot Table is also accompanied by a chart that is linked to the pivot table and dynamically updates itself as you modify the pivot table. The chart defaults to a Column type and there are options to change this.
Detailed instructions on building a pivot table
View Options
Menu: View
The view menu contains options to allow the user to toggle the visibility of the pivot table and chart independently.
There are also options to alter the chart type to one of the following:
- Area
- Bar
- Column
- Line
- Pie
- Stacked Area
- Stacked Bar
- Stacked Column
Further customisations to the chart can be made via the Customise chart... menu and choosing the Options tab.
Save Pivot Table Definition
Menu: File > Pivot Definition
There are functions to save and load the pivot table definition to a file.
- No data is saved with the pivot table definition, only the field names and their locations
- The source data must contain the fields that were used in the original pivot table when loading pivot definitions.
- Save your Output Field Lists when you Query the Database to help with this]]
- Pivot Table definition files can be shared with other users
There is no need to save the chart definition as it is directly linked with the pivot table.
Exporting Data
Menu : Export
The export menu on the Pivot Table tab allows the user to export the pivot table as an Excel workbook. Note that the pivot table is exported as a standard worksheet in Excel, not as an Excel pivot table.
There is also an option to save the Chart as an image. The default image type is PNG that is widely supported in Office applications and on the web. JPEG, EMF & WMF are also available where needed.
Printing Data
Menu: Print & Publish
The Print & Publish menu contains the following options:
- Print Pivot & Chart: Opens the standard print dialog & prints pivot & chart
- Pivot & Chart to PDF: outputs pivot & chart components to a PDF file
- Pivot & Chart Preview: on-screen display of how the output will look
- Report Page Setup: allows configuration of page orientation, scale, size etc.
Memory Usage
- Results from large queries like IBID and IBID & Dependency can use a lot of memory.
- Reduce the memory usage by:
- Restricting the output fields to only those that are required for your analysis task. Comment & long text fields are especially expensive on memory usage - avoid outputting those where possible
- Reduce the records returned in the results by making use of the query criteria, rather than relying on column based filtering in the results.
- If you're analysing the data in the pivot table, or just exporting the data, then do not sort or group the search results grid. Searching and grouping requires a large amount of memory overhead versus just raw data.


