Significant Events
This topic is for AquilaCRS
Contents
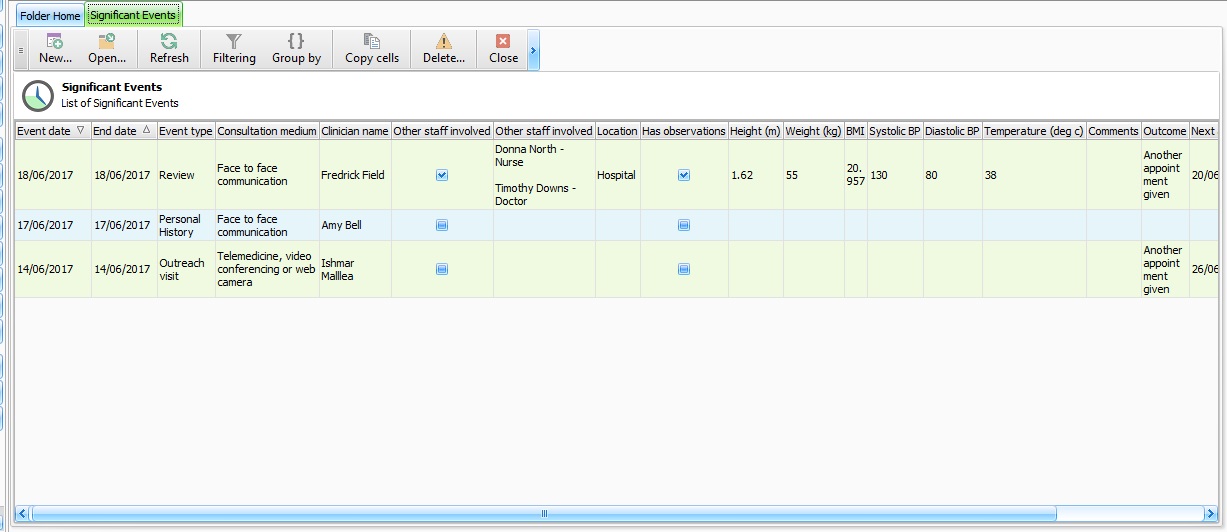
List of Significant Events
The Significant Events module enables the user to record other injuries, reviews, observations, events and images that are non-iBID & non-Dependency related.
To enable the Significant events module a serial number will need to be entered in to Aquila as follows.
- First close any open patient-related records
- Go to AqiulaCRS tab
- Open Tools > Options
- Go to "Licence Keys" tab
- Press "Add Key" button
- Select "Significant Event" in the Product Feature box.
- Paste in your serial number, if you don't have a serial number please [contact us].
- Check that Significant Events is added to the list of installed licences
Significant events should not be used for any information that can be entered in to iBID or Daily Dependency records.
New - Selecting the New button will create a new significant event
Open - Click a significant event on the list and select the Open Button
Refresh- Refreshes the Significant event list.
Filtering- Select the filter button and a field will open at the top of the significant events list click on the field you want to filter by. Type or choose from drop down list the filter required.

Group by - Select the Group By button and a field will open above the significant events list, drag the column title you want to group on to the group by field.

The significant events will now be displayed in groups, click on the + to view the groups contents

Copy Cells- Highlight the selected cells and choose Copy Cells to paste in to any other medium such as Excel.
Delete - Select Significant Event to be deleted and click the "Delete" button, a confirmation box will appear, enter reason for deletion, click "Delete" on confirmation box.
New Significant Event
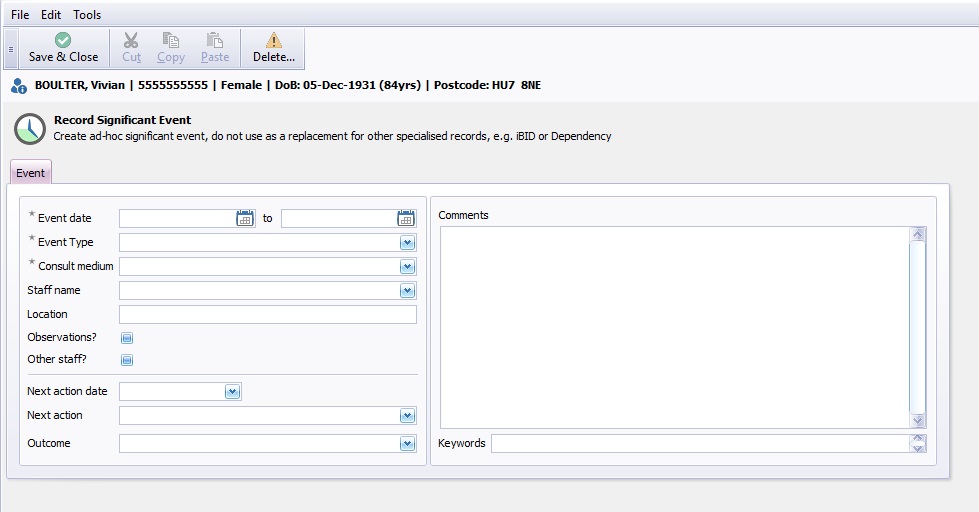
Select the New button and a new event window will open.
Enter the event start and finish date. if the event is 1 day, enter the same date in both boxes.
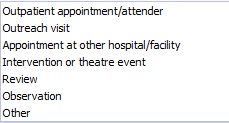
Event Type - Select the Event Type from the drop down list.
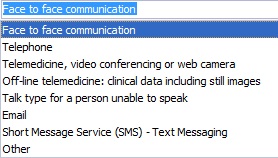
Consult Medium - Select the communication type from the drop down list.
Staff Name - Select the Staff name from the drop down list.
Location - Type in the Event location in the field provided.
Observations? - Tick Box to enter patients observation. For further details please see below.
Other Staff? - Tick Box to list other staff members involved. For further details Please see below.
Next Action Date - Choose date from drop down calendar
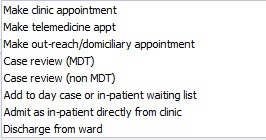
Next Action -Choose next action from drop down list:
Outcome - Choose outcome of event from drop down list:
Comments - Free type relevant comments in to box provided.
Keywords - Enter searchable keywords in to Field provided.
Observations
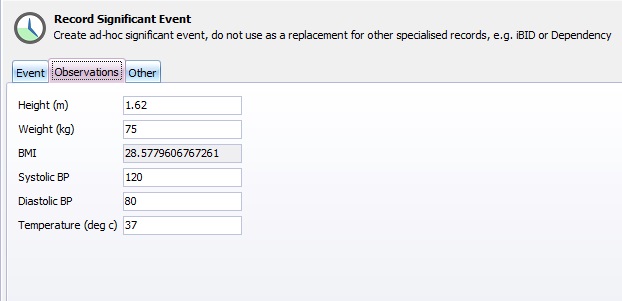
When ticking the Observations? Tick box a new tab will open.
Enter the patients details at time of the event;
When entering the Height and Weight, the BMI will automatically be filled in.
Blood pressure & Temperature.
Other
When ticking the Other? tick box another tab will appear with a free type box to enter any other staff member present at the time of the event.
Editor Types
Date Editor
Can free type date or select from drop down calender. Enter "Today" or press "Clear to exit without entering data.
Time Editor
Can free type time or use scroll bars at the right of data field.
Date & Time Editor
Free type date dd/mm/yyy and time 00.00, or drop down list. Choose "today" button if event was day of inputting data or "Clear to exit field without data entered.
Drop Down / Lookup List
The Lookup List is a collection of common names, places, catagorys, or other types of information that can help you choose a required field. Click on the down arrow to the right of the data field, highlight the relevant information to enter.
Staff Drop Down / Lookup List
Populated by staff names entered as "Users" in Administration.
'Yes/No/(Don't Know Drop Down
A special kind of drop down list to allow a clearer selection of yes, no & don't know when compared to the tick box. Used predominantly in the iBID editors, but due to roll out to all data-entry fields. Input via keyboard can be acheived by pressing Y or N on the keyboard.
Tickbox
Checked - Positive with a known value = 1.
Unchecked - Negative with a known value = 0.
Gray - Don't know with a value = null.
Please note: Check boxes are grey (Unknown) by default.
Postcode Editor (2 part)
Free type 1st part of postcode letters and numbers.
Free type 2nd part of postcode numbers and letters.
Text Field
A free type field to enter as much detail as possible.
(Note: Max 255 characters)
Memo Field
A free type field to enter as much detail as possible (Unlimited chars)
Automatically Filled in Fields
Sometimes shaded, Aquila will fill in these fields automatically from the data entered in previous fields.
